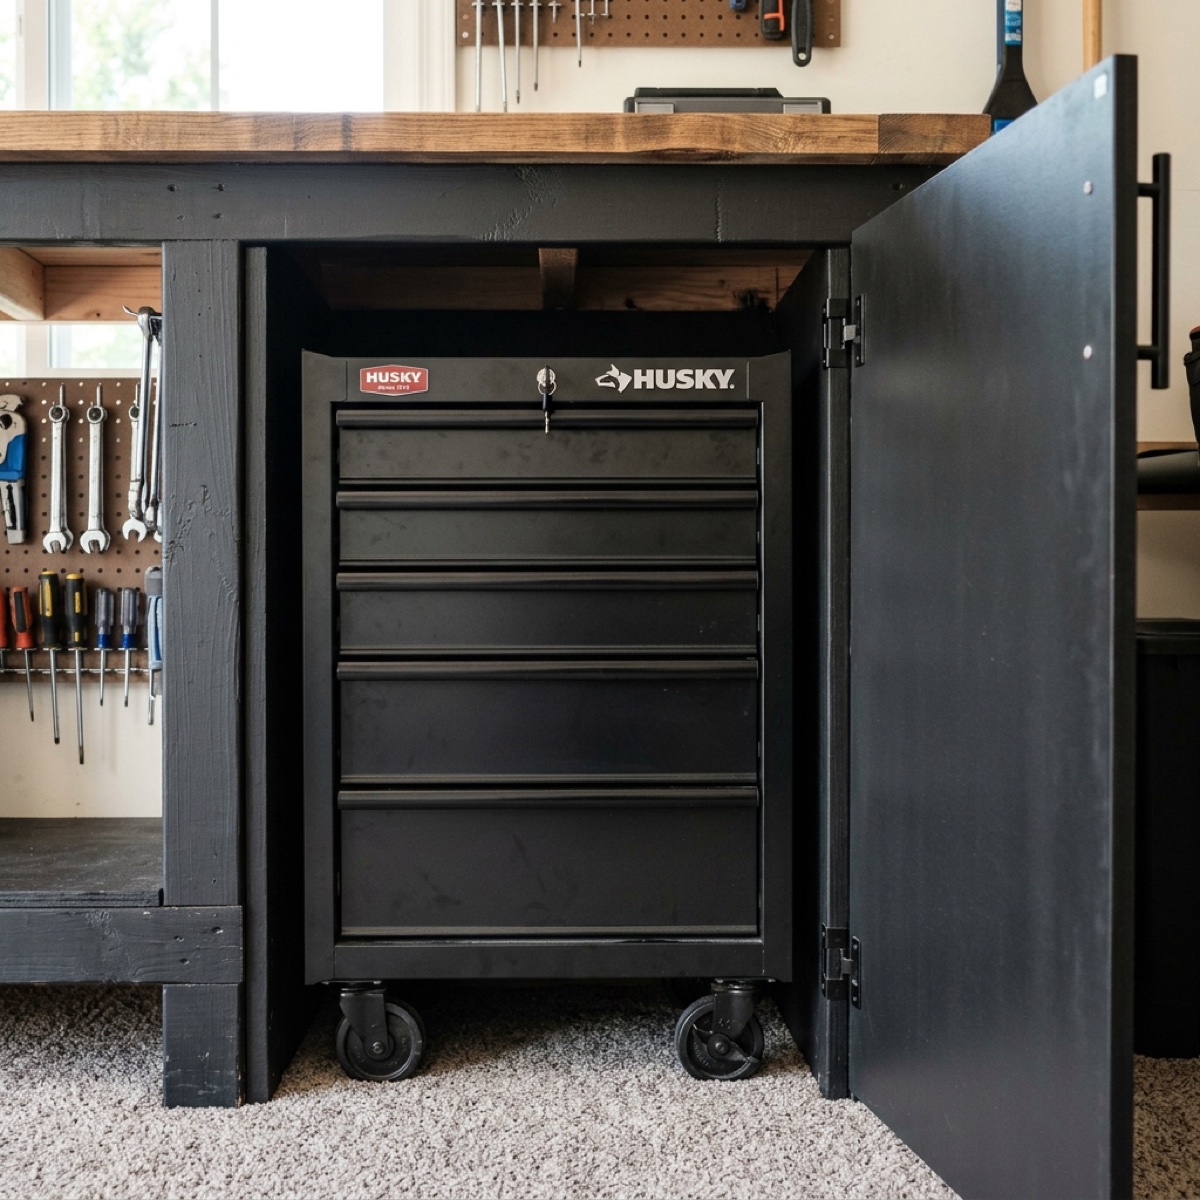
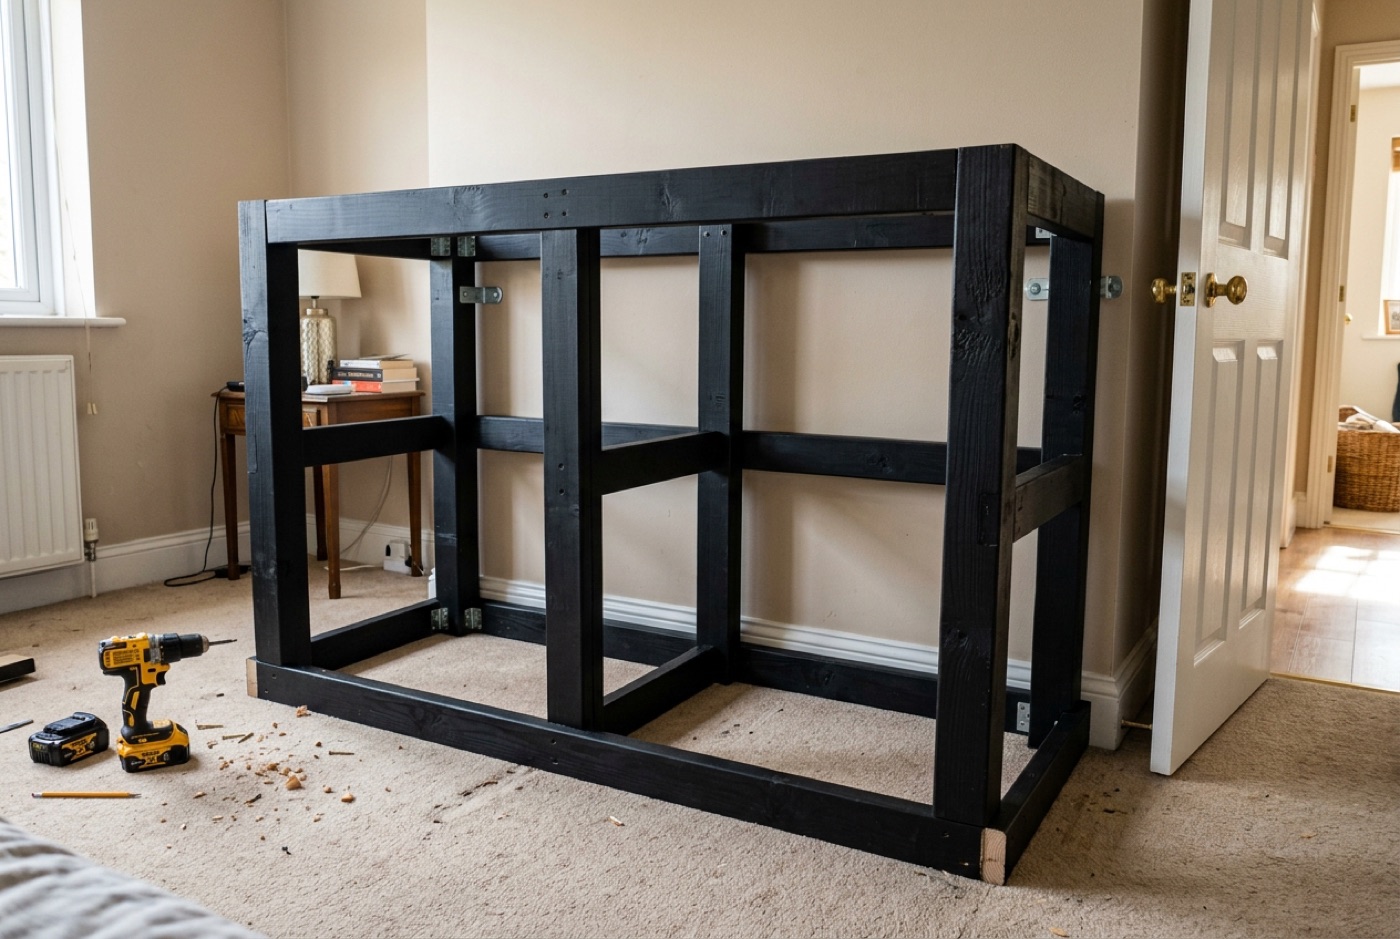
Four phases over a weekend plus paint-cure time. Most of the "building" is a small wooden base — the cabinets you buy. Check off each step as you go; your progress is saved in your browser.
Progress:0 of 0 steps
Read this first
The hard part of this build isn't woodworking — it's getting two 186 lb steel cabinets up your stairs. Strip the drawers out first; the empty shell is ~100 lb. Build and paint the plinth in the garage, haul everything up, and assemble in the bedroom.
The stack at a glance
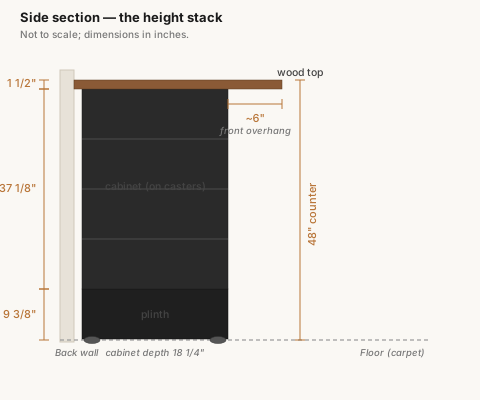
How the 48" counter height is reached: a ~9 3/8" plinth lifts the 37 1/8" cabinets so the 1 1/2" top lands at 48".
The height stack. Plinth (9 3/8") + cabinet (37 1/8") + top (1 1/2") = 48". The top overhangs ~6" in front for knee clearance.
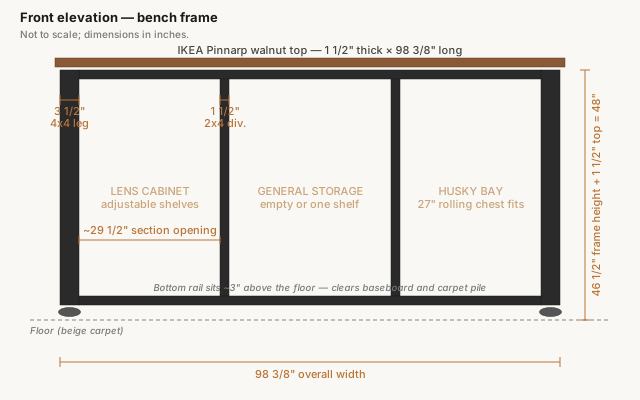
And from the front — two 9-drawer cabinets on the black plinth, with the end column filling the last ~6" to the door.
Front elevation. Two cabinets (46 1/4" each) butted together, ~6" black end column on the door side, ~98" overall.
Joinery 101 — you barely need any
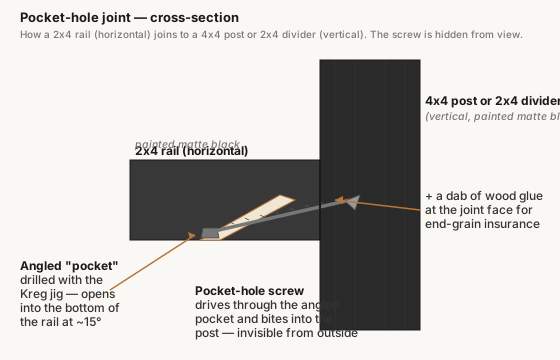
Good news if you're new to this: you buy the cabinets, the top sits on metal brackets, and the wall ledger is just lag bolts. The only real woodworking joints are in the plinth and the end column — and both get painted black, so the joints hardly show. One technique covers all of it: pocket holes (your Kreg jig). A pocket screw drives at an angle into hidden holes, pulls the joint tight, and is stronger than a straight screw — and you never see it.
The angled "pocket" hides the screw inside the joint, leaving the show face clean. A dab of glue at each joint does most of the holding.
The only joints this build needs
Where
Joint
How (with your tools)
Plinth corners (2x10 → 2x10)
Butt joint
2 1/2" pocket screws + wood glue. The glue is the strong part; the screws just clamp it while it dries.
Internal joists → perimeter
Butt joint
Same — 2 pocket screws + glue per end.
Plywood deck → frame top
Face screw
Glue + 1 5/8" screws every ~8–10". This sheet is what makes the box rigid — like the back panel of a bookshelf.
Skirt & curb panels → frame
Glue + brads
Brad nails or screws from behind, so nothing shows on the front face.
End column
Butt joint
Pocket screws + glue, then skin in plywood.
That's the whole list — no dovetails, no mortises, nothing that needs practice to look right.
Three rules that make it look good
Glue every joint. A glued-and-screwed butt joint plus the glued plywood deck is plenty for a static ~500 lb. Wood glue out-holds the screws.
Clamp the show faces flush before driving — a pocket screw can shove a joint out of line as it tightens. And drive with a regular drill on a low clutch, not an impact, or you'll over-drive the screw. Test on a scrap first.
Hide every fastener. Point pocket holes down or inward; attach the front skirt from behind; fill any visible screw head with wood filler, sand flush, then prime and paint. A bead of paintable caulk along seams makes it read as one solid black base.
Phase B — Get the cabinets upstairs ~1–2 hours, two people
This is the dangerous step
186.5 lb of steel on a staircase is how people get hurt and how drywall gets gouged. Never carry a loaded cabinet. Strip it, strap it, and use a helper.
Phase C — Set, level, and anchor ~2–3 hours
Phase D — Top, outlet, and load ~2–3 hours, two-person for the top
If you got this far
Take a photo of the finished bench from the same angle as the hero image up top. Send it to me — I want to see the real thing (and replace the old render).